


Roofing / Job documentation
Turn roofing inspection notes into a clear next step
Organize roofing inspection photos, findings, repair options and customer follow-up with a practical checklist and a message template.

The quick answer
What should you send after a roofing inspection?
Send a short summary of the observed findings, labelled photos, the recommended next step and any repair options or quote that is ready. Explain what remains uncertain or needs further assessment. Give the customer one clear action, and record who will follow up and when.
- Pair every finding with its location and a useful photo.
- Separate observations, proposed work and approved work.
- Close each follow-up with a specific next action.
The workflow at a glance
From inspection record to a decision
- 01
Locate
Roof area and observed condition
Inspector - 02
Explain
Captioned photos and limits
Estimator - 03
Offer
Clear next step or repair options
Office - 04
Follow up
Customer decision and dated action
Named contact
Organize findings by area, not by upload order
Phone galleries are chronological; a customer usually needs a location-based explanation. Group your inspection record by roof section, elevation or a recognizable reference such as a skylight. Keep the same labels in notes, captions and the proposed work.
For each finding, record what was observed, where it was observed and which photo shows it. Distinguish an observation from a conclusion that still needs assessment. This article covers the documentation and follow-up after an inspection, not a technical roof inspection procedure.
| Record field | Useful content |
|---|---|
| Location | An identifiable roof area or feature. |
| Observation | What was visible, with a photo reference. |
| Limits | Any area not assessed or question still open. |
| Next step | Assessment, repair option, quote or customer decision. |
- Location
- An identifiable roof area or feature.
- Observation
- What was visible, with a photo reference.
- Limits
- Any area not assessed or question still open.
- Next step
- Assessment, repair option, quote or customer decision.
Choose a small photo set that explains the finding
Start with a wider view that helps the customer find the area. Follow it with the relevant detail and a short caption. Sending dozens of similar images can make the important finding harder to see.
Keep original files in the project. Use annotations to point to a feature, not to exaggerate a condition. Label any comparison accurately and use before-and-after labels only when the photos actually show the same work at different stages.
- Use the same area name across the photo caption and written summary.
- Identify uncertainty in the text instead of expecting an arrow to explain it.
- Review shared photos for private information or material from another property.
Make each proposed option understandable on its own
For every repair option, describe the proposed work, the area it covers and what is excluded. If more assessment is needed before pricing, make that the next step. A customer should be able to tell whether they are being asked to approve work or arrange another visit.
Keep unanswered questions beside the option they affect. Do not let an uncertain condition turn into an unqualified promise in a quote. When the customer chooses an option, record that decision and update the job's scope before arranging the work.
Send a message with one clear action
The follow-up message should explain why the customer is receiving it and what to do next. Link the selected photos and the relevant quote or summary. Use the customer's agreed communication channel.
A specific next action is easier to respond to than 'just checking in.' Ask for a choice, an appointment window or an answer to the open question. If the customer says the timing is wrong, record the requested follow-up date instead of sending repeated generic reminders.
Keep the decision with the inspection record
Record the sent date, the contact, the customer's response and the next action in the same work record. Keep requested changes distinct from accepted work. If the plan changes, make sure the crew receives the current scope rather than an earlier summary.
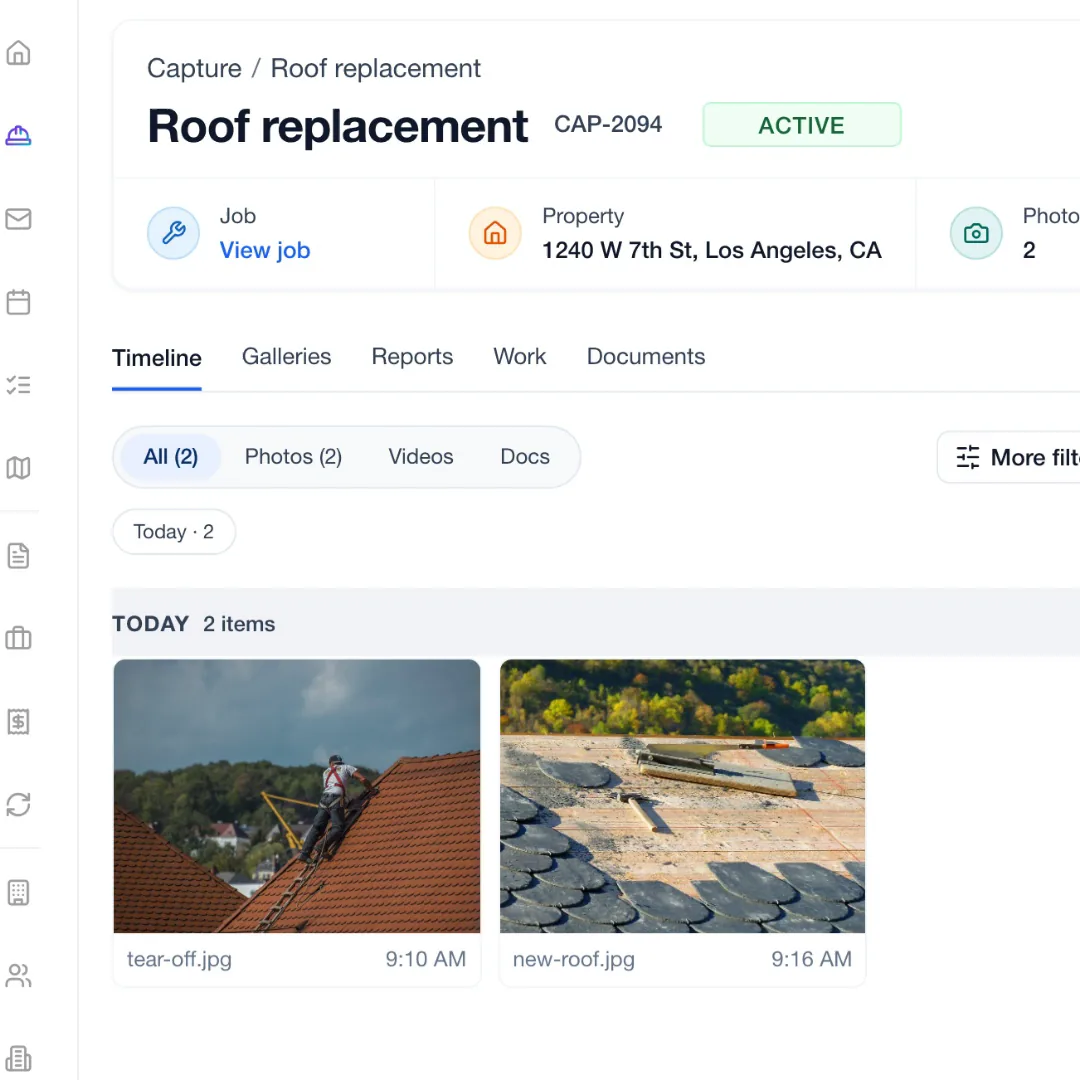
In JobsiteOn Capture, you can share a chosen gallery rather than the whole project. Set the download, detail, password and expiry options appropriate for the recipient. The customer can view the shared material without a JobsiteOn account. Keep the quote and scheduling steps separate until the customer has made the required decision.
Take it to the next job
Roofing inspection follow-up checklist
- Confirm the property, visit date and contact.
- Group findings and photos by roof area.
- Separate observations from conclusions and open questions.
- Choose and caption the images the customer needs.
- Describe each proposed option and its exclusions.
- Check the shared gallery and its access settings.
- Send one clear next action through the agreed channel.
- Record the customer's decision, follow-up owner and date.
See it in JobsiteOn
Capture, connected to the job.
Keep project photos organized and share the selected material a customer needs to review.
Common questions
How many roofing inspection photos should you send?
Send enough to explain each finding and its location. There is no useful universal count. A clear overview, relevant detail and caption are more helpful than many near-duplicate images.
When should you follow up after sending a roofing quote?
Agree on a follow-up date when you send the quote or discuss the options. Base it on the customer's timing and any open questions, then record a named owner for the follow-up.
Does the customer need a JobsiteOn account to view shared photos?
No. A Capture share link gives access to the selected material without an account. Password, expiry, downloads and detail settings still apply.
Sources and editorial notes
Published by JobsiteOn. This guide combines practical workflow suggestions with the product instructions below. Examples and amounts are illustrative. Product details were checked on .
- Share Photos with a Link
Product reference for gallery sharing, passwords, expiry and download controls.
- Before-and-After Photos
Explains paired photos and comparison exports. Only pair images that truthfully represent the work.
The cover photo is by artellliii72, used under the Pixabay Content License. Photos depict stock scenes. Screenshots show the real app with sample records, not customer results.
Suggest a correctionKeep the work moving.
All guides
Job photos that explain the work
Build a useful job photo record with location context, detail shots, honest before-and-after pairs, upload checks and a customer-sharing checklist.
Read the guide
Build a field service schedule with room for the real day
A practical field service scheduling guide with a capacity calculation, appointment checklist and a method for handling changes without overbooking.
Read the guidePut the workflow to work
Your next job, in one place.
Keep the quote, schedule and work record connected.